
Launch Checklist
Unsure if you're ready to launch? Go through this checklist and make sure your experience is ready to share on your website and social channels!
1. What channels will your experience live on?
Have you thought about the traffic drivers that will lead to your Jebbit experience? Is the CTA clear? Does the user understand what they will be doing once they click through to the experience? We recommend always taking another look at your traffic drivers prior to launch to ensure the user experience is fluid and engaging.
2. Preview your experience
Check both desktop and mobile to ensure all of your text and imagery is set. You can use the QR code within the desktop preview to conveniently view the experience on your mobile device, or select the three-dot vertical menu to preview a mobile version on your computer.

3. Screen Names
Make sure each of your screens is named after the individual screen. This will help when analyzing the data within your Analytics Dashboard.

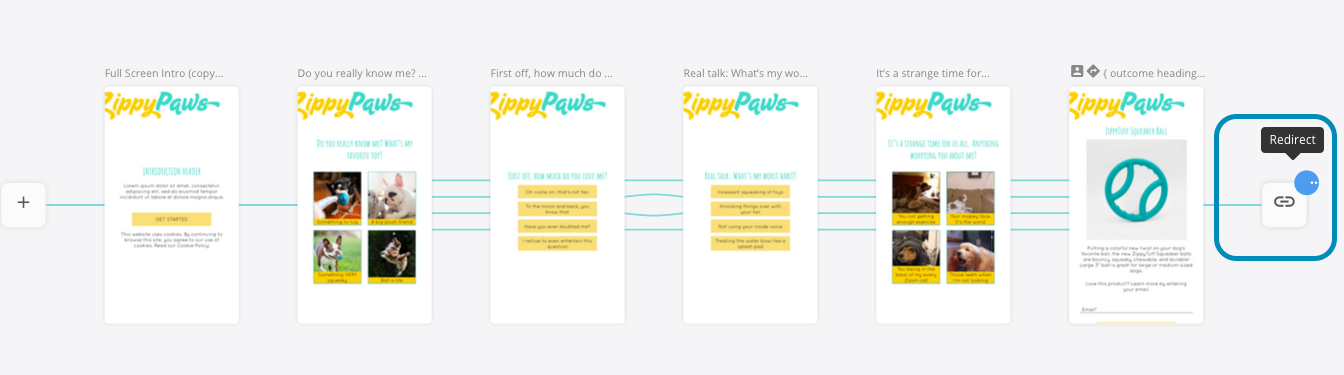
4. Check your nodes
There shouldn't be any empty nodes at the end of your experience. Ensure your experience ends by driving users to another URL to continue their engagement with your brand. Learn more about adding URL redirect links here.
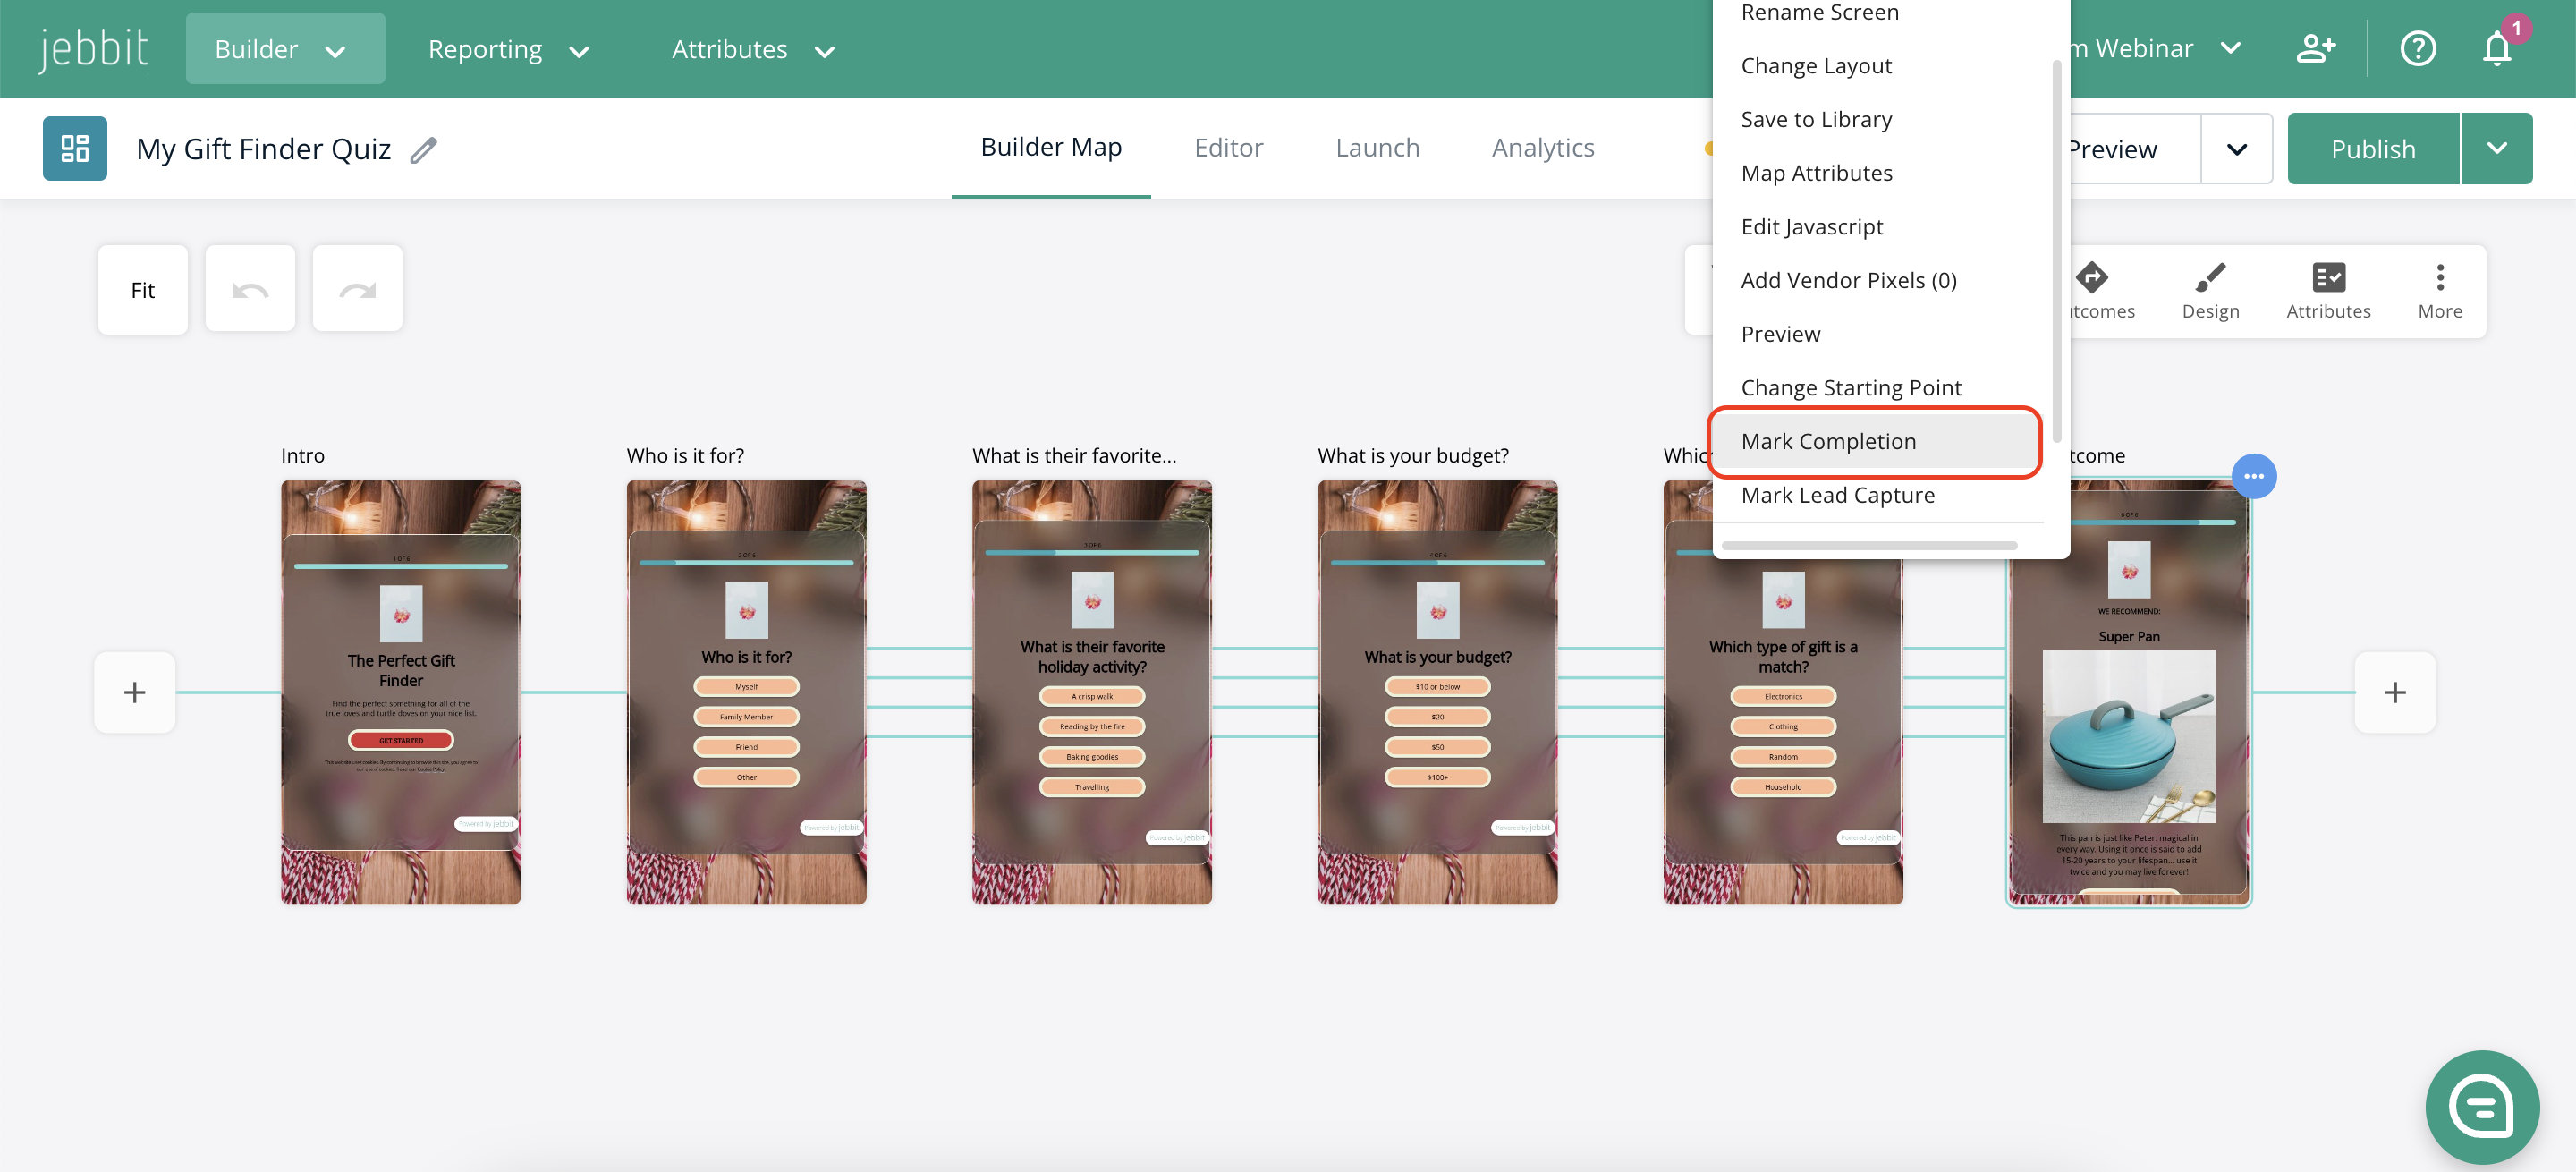
5. Marking completion
“Completions” in the Analytics Dashboard are automatically counted once a user makes it to the end of a Jebbit experience. The exception is when there is a lead capture screen within the experience. If you’d like completions to be marked at a different point in the experience, this article is where you can learn how to do it!
6. Map Outcomes
If you are using personalized outcomes in your experience (mapping a dynamic screen back to a user’s responses within the experience), ensure your outcomes are mapped.
7. Customize your Social Post Preview
When it’s shared, the Social Post Preview for the experience will appear with the copy and imagery you choose - perfect for Facebook & Twitter sharing!

8. Check your launch links
Make sure you are using launch links when distributing an experience and not preview links. Look at the URL. If it ends with "draft=true" it's a preview link!

9. Check your pixels
If you’ve added pixels to an experience, check to ensure they are firing properly. If you need to add pixels, you can use our self-serve tool for Facebook or Neustar pixels, or reach out to your Customer Success team for help implementing all other pixels.
10. Check User IDs
If you’re launching in email, ensure your user IDs will be passed through so you can identify each user’s responses with their unique identifier in your system.
11. Check your Integrations
Have an integration set up with Jebbit? Refer back to your documentation and your dedicated Customer Success team to ensure your experience is set up to pass back data correctly. If you have integrations set up, you would need to add Attributes! Check out this guide for more information on how to set up Attributes!
12. Run Test Submissions
After verifying the above checklist, it is now time to run test submissions on the launch links to ensure that the quiz is collecting, storing in the platform, and or passing data to the connected integrations. Learn how to generate the quiz launch links here!
Keywords: launch, launching, publishing, live, testing, checklist, previewing