
Setting Up Your Klaviyo Integration
Jebbit is excited about our partnership with Klaviyo, because it allows you to capture emails and even more first-party data from your quizzes in real time. Connecting to your Klaviyo instance has never been easier, and only requires a few clicks within the Jebbit platform. Check out the video below, or continue reading, to learn how to connect and pass data to Klaviyo.
Video Tutorial
Step-by-Step Guide
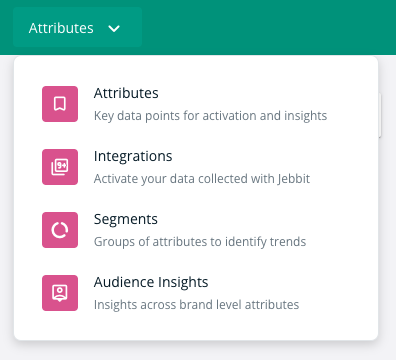
Click on the dropdown menu of the Attributes tab on the top nav bar in the Jebbit platform, then select ‘Integrations’.
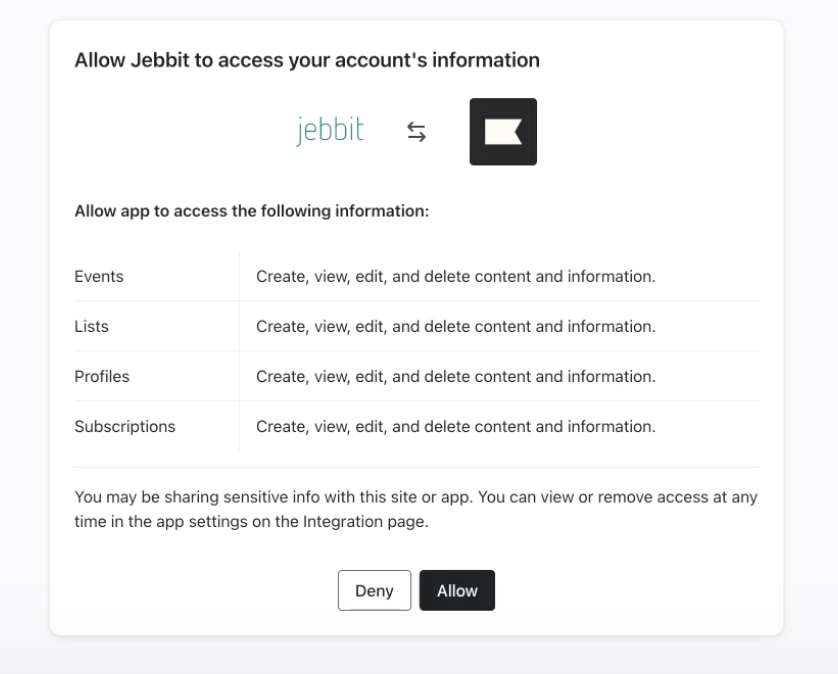
Click on the Klaviyo tile and select 'Use Integration.' This will route you to Klaviyo and allow you to authorize the integration via an OAuth Flow. Select "Allow" to move forward.
After selecting "Allow," you will be brought directly back into Jebbit to configure additional settings on your integration, like the List ID, how members should be added to the List, and additional data points you want to pass over.
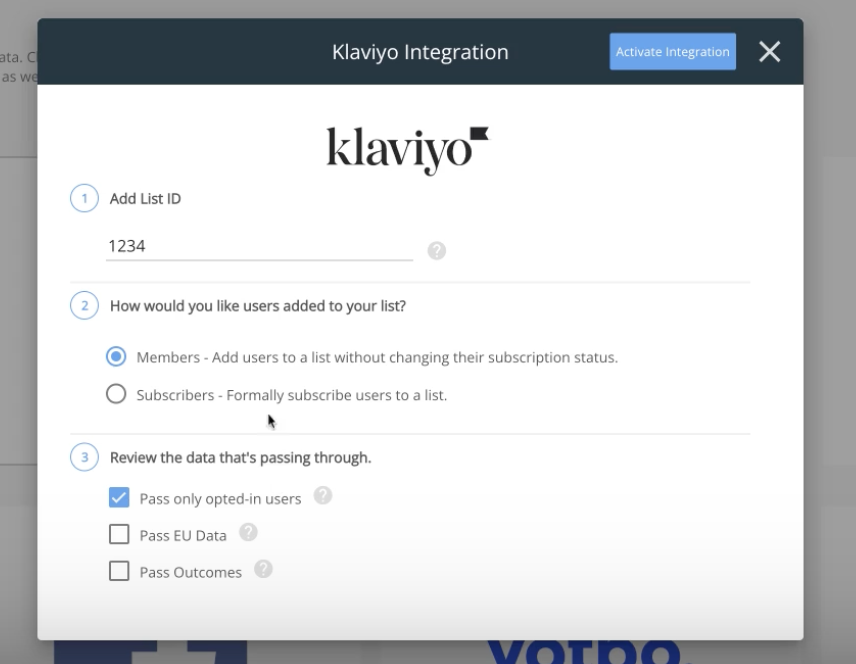
Please refer to the Klaviyo documentation here on how to find your List ID.
Select Members or Subscribers. Selecting ‘Subscribers’ will make it so users are added as members to your list alongside the Metric "Subscribed to List."
Select whether you would like to pass only opted-in users. If you check off this setting, then you will need to map an opt-in attribute to an opt-in checkbox on your lead screen. The result is that users who check off the opt-in box from the lead capture screen will collect the “Opt-in=TRUE” attribute value pair. If they do not check the box, they will collect the “Opt-in=FALSE” attribute/attribute value pair. With this setting enabled, we will only send user sessions when “Opt-in=TRUE” is collected.
Indicate whether you are passing data from the EU. If you expect to receive traffic from the EU on your quiz, and want Jebbit to funnel these submissions into Klaviyo, you will need to check off this box.
Select whether or not to Pass Outcomes. Selecting this checkbox allows Jebbit to send the “Outcome Name” that a user is matched with as a Custom Property on their profile. If you want to receive more information related to a user’s Standard Outcome, or if you are using the Dynamic Product Feed in your quiz, then open the “Select Details” dropdown, and check off every other detail that you would like us to send to Klaviyo, related to a user’s product recommendations:
When you are dong configuring your settings in Jebbit, click on 'Activate Integration' to complete the setup.
FAQs
Q: I'm collecting Phone Numbers through Jebbit, but I'm not seeing the SMS Opt-in in Klaviyo?
A: In order for the SMS Opt-in flag to show on a user's profile in Klaviyo, Jebbit needs to pass "sms_consent=true" over to Klaviyo for the user's session. The easiest way to do this is to map "sms_consent" to the Opt-in checkbox associated with the Phone Number collection on your Lead Form. That way, when a user submits their Phone Number and checks the Opt-in box, we will send "sms_consent=true" to Klaviyo, which in turn will add a green checkmark to the user's profile that shows SMS Opt-in.

Q: Do I have to collect an email to send submissions to Klaviyo?
A: Emails are required in order for a Jebbit to send a submission to Klaviyo to add either a new profile to your specified list, or to add new Custom Properties and Events (Attributes) to existing profiles in your list.
Q: Is the double opt-in option in Jebbit's Klaviyo Integration configuration menu the same as Klaviyo's double-opt in?
A: Jebbit's setting of the same name is not the same as the Double Opt-in versus Single Opt-in options. This setting in Jebbit only dictates whether Jebbit will send the session to Klaviyo in the first place. From there, the Opt-in settings that you configure on your Klaviyo List will dictate how the user is added to the list by Klaviyo.
Q: Is there a limit to the number of attributes I can send to Klaviyo?
A: You can map as many Attributes as you would like onto your Jebbit experiences and we can pass all of them as Custom Properties and Events into Klaviyo to help you enrich your user profiles! For more guidance on passing Attributes, read here!
Q: What should I do if I want to target existing subscribers?
A: If you plan to run a campaign targeting existing subscribers then you will need to read our article that outlines this process here! Notify your Success Rep or reach out to our Support team to make sure your Klaviyo integration supports capturing emails via the UID parameter in your launch URL. This is not enabled by default.
Q: Why aren't users automatically being subscribed to my list?
A: Klaviyo will set the list that you create to a Double Opt-in Setting by default. This means that for a user to be added to a list, they will need to opt in through Jebbit, as well as opt in through an email that will be triggered from Klaviyo after they submit their email in Jebbit. Enable Single Opt-in on your Klaviyo List if you do not want this behavior, and would instead like users to be added to your List without needing to respond to a Klaviyo-generated opt-in email.
Q: What trigger should I use to send follow up emails to Jebbit users in Klaviyo?
A: Jebbit sends all user session data as Custom Properties and Events so you have a lot of options for triggering emails from Klaviyo with Jebbit data. We also send a few Metrics as well. Learn more about all of this here!
There you have it! Now that you know where to go to connect your Jebbit account with Klaviyo, and what each of the settings mean, you are ready to activate your integration!
Related Articles
Keywords: klaivyo, integration, trigger email, follow up email, retargeting, subscribers, custom property, customer properties, attributes