
Outcome Customization
If you are adding Standard Outcomes to your experience campaign, this article dives into the specific dynamic elements to customize each outcome.
Video Tutorial
Step by Step Guide
Enter the Outcome Name first. This is an internal field but is essential for matching users to the correct Outcome, and reporting.

Add an Outcome Heading. This is the text value that will be dynamically inserted into an experience wherever the {Outcome Heading} element is used.

Add an Outcome Description. This is the text value that will be dynamically inserted into an experience wherever the {Outcome Description} element is used.

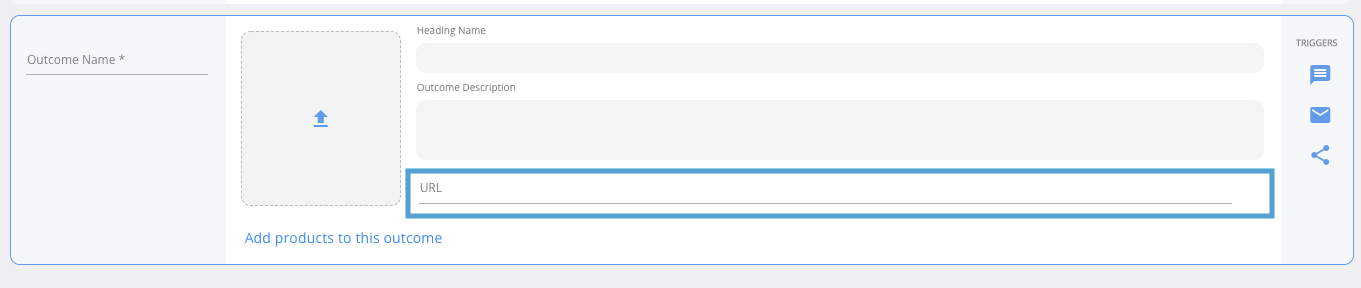
Add an Outcome URL. This is the URL that users will be directed to when they match with the Outcome. When using an Outcome URL, you will also add a Redirect URL node in the builder map, and set it to the "Outcome url."
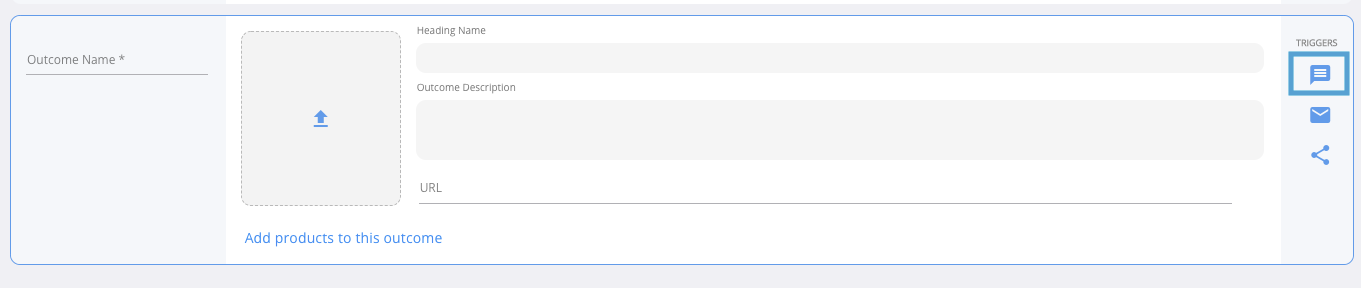
Add a Trigger Text Message. This is the content of a text message which can be sent to users when they match with the Outcome. When using Outcome Trigger Texts, you will also add a Trigger Text node in the builder map to actually get the text message to send.
Add a Trigger Email. The subject line and html email file which can be sent to users when they match with the Outcome. When using Outcome Email Triggers, you will also add a Trigger Email node in the builder map to actually get the email to send.

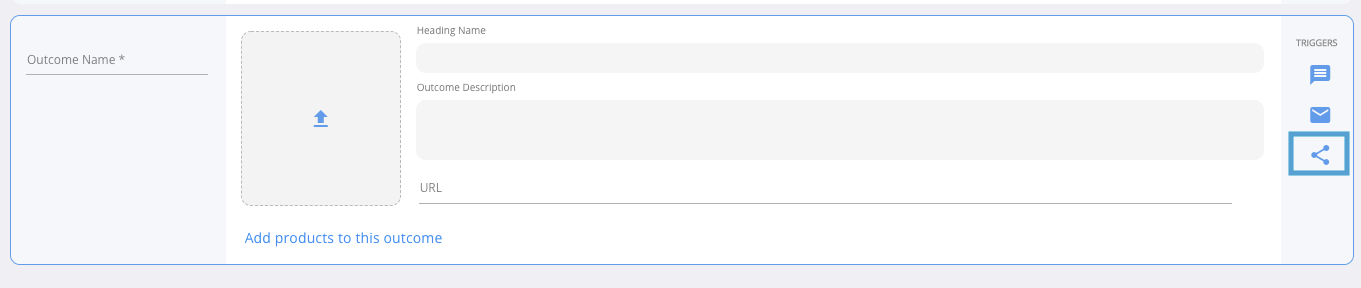
Add a Social Share Card. You can define the content that will appear when a user shares your experience on Meta (Facebook) and/ or X (Twitter). When using Outcome Social Share Cards, you will also add the Social Share Button element to a screen within the screen editor to allow the user to share the Outcome specific social post.
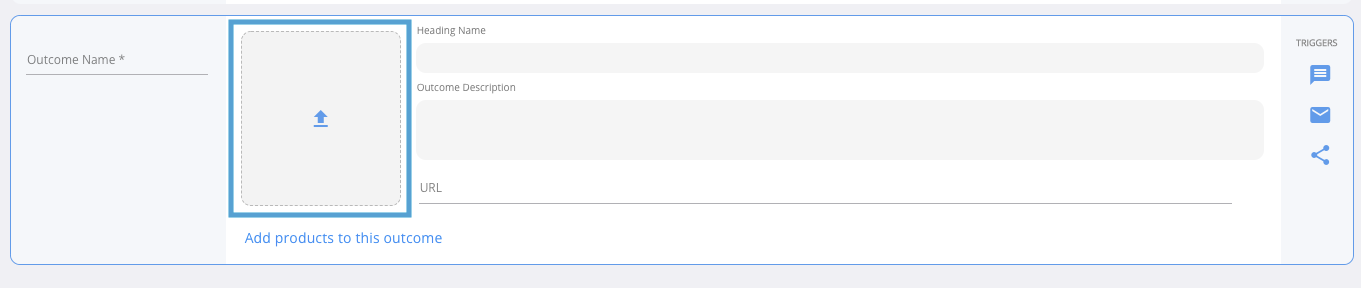
Add an Image, .gif, or Video. This content will be dynamically inserted into an experience wherever the {outcome image} element is used.
Add Minimum # Correct. This field is only relevant when using Scoring Outcomes. It is the minimum number of correct answers required to match a user to an Outcome. In most cases, this would be a trivia score.

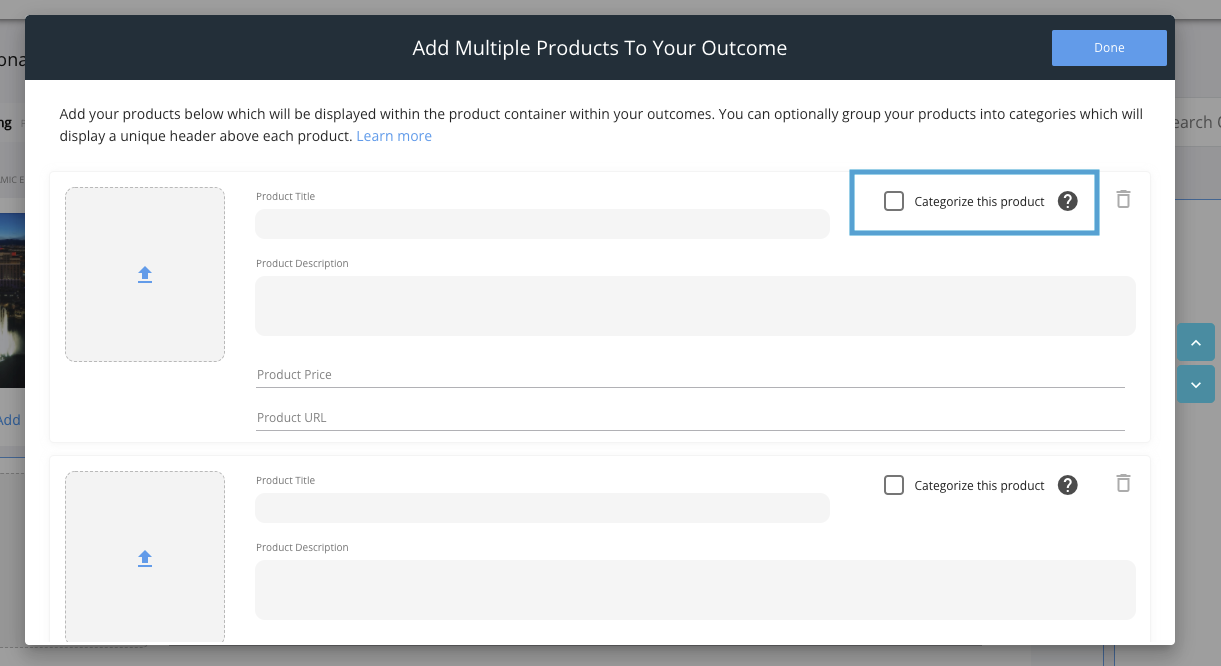
Add Multiple Products. The additional products that you add to an Outcome will be displayed when the Products container element is added to a screen. You are able to add up to 24 additional products per Outcome.

Categorize each Product. When adding additional Products to an Outcome, you also have the option to Categorize each Product. This allows Jebbit to group similar Products on screen together. For example, you may set up "AM" and "PM" Categories to show users a routine.
Frequently Asked Questions
Q: Are all of the Outcome fields required or are some optional?
A: Only the Outcome Name is a required field. All other fields are optional and you can choose to customize them or not.
Q: Is it possible to match a user to an Outcome without showing the Outcome in Jebbit?
A: Yes, you can certainly match users to Outcomes without actually showing the user any Outcome elements in Jebbit. Usually, a brand does this when they want to dynamically send users to a relevant URL onsite. In this case, you will create an Outcome and only customize the URL field. Then, you will set up a Redirect URL node in the builder map that is tied to the "Outcome URL."
Q: I've added Products to each Outcome but I don't see them populating on the Outcome screen.
A: Make sure you've added the correct element to your Outcome screen in order for the additional Products to display. The "Products" element is how the additional Products will be shown.
Q: Am I able to customize more dynamic elements than what is shown in the Outcomes menu?
A: Yes! If you don't see the option to customize an additional dynamic element that you would like to serve alongside an Outcome within our Standard Outcomes menu, then you will use an Outcome Split. An Outcome Split will allow you to create a unique screen for each Outcome, which in turn allows you to customize different elements on each screen. For example, you can add a secondary Outcome URL if you'd like.
Q: How many products can I add to each Outcome?
A: You can add up to 25 products per Outcome. You can accomplish this by customizing the main Outcome fields, as well as adding additional Products into the Outcome too.
Q: My Outcomes won't auto-save.
A: If you are running into errors with our Outcomes saving, it's likely because you did not add an Outcome Name to start. Refresh your page and rebuild your Outcomes but make sure you always create the Outcome Name first to avoid any more saving errors.
Q: I'm adding a lot of Outcomes to my quiz. Is there an easier way to customize them?
A: Yes! In fact, if you are adding more than 10 or 20 Outcomes to your quiz, then we recommend that you switch to using the CSV import and export option. This will allow you to customize your Outcomes within a .csv file, and then upload them into Jebbit when you're ready. This can be a huge time saver. Plus, you get the added bonus of having a backup copy of your Outcomes in case you ever need to re-import them again.
Q: How do I add more line breaks into my Outcome Descriptions?
A: Our Outcomes menu accepts HTML formatting. If you want to add more line breaks, or any more style customizations to certain Outcome elements, then you can add HTML. For example, adding <br> after a sentence within the Outcome Description would insert a line break. And wrapping a phrase in <b> </b> tags like <b> this </b> would bold the text.
Related Articles
Keywords: outcomes, outcome customization, product match, trivia, multiple products, outcome elements