
Google Analytics tracking for Jebbit Experiences
Viewing Jebbit data into Google Analytics allows you to look at the impact of a user engaging with an experience as it relates to the entire journey.
Here are a few ways that can be beneficial:
Conversion rate of users who completed Jebbit experience vs. sitewide average
AOV of users who completed Jebbit experience vs. sitewide average
Leads captured through Jebbit experience
Step by Step Guide
For Universal Analytics, go to a report (such as Conversions > Ecommerce > Overview), and click + Add Segment:

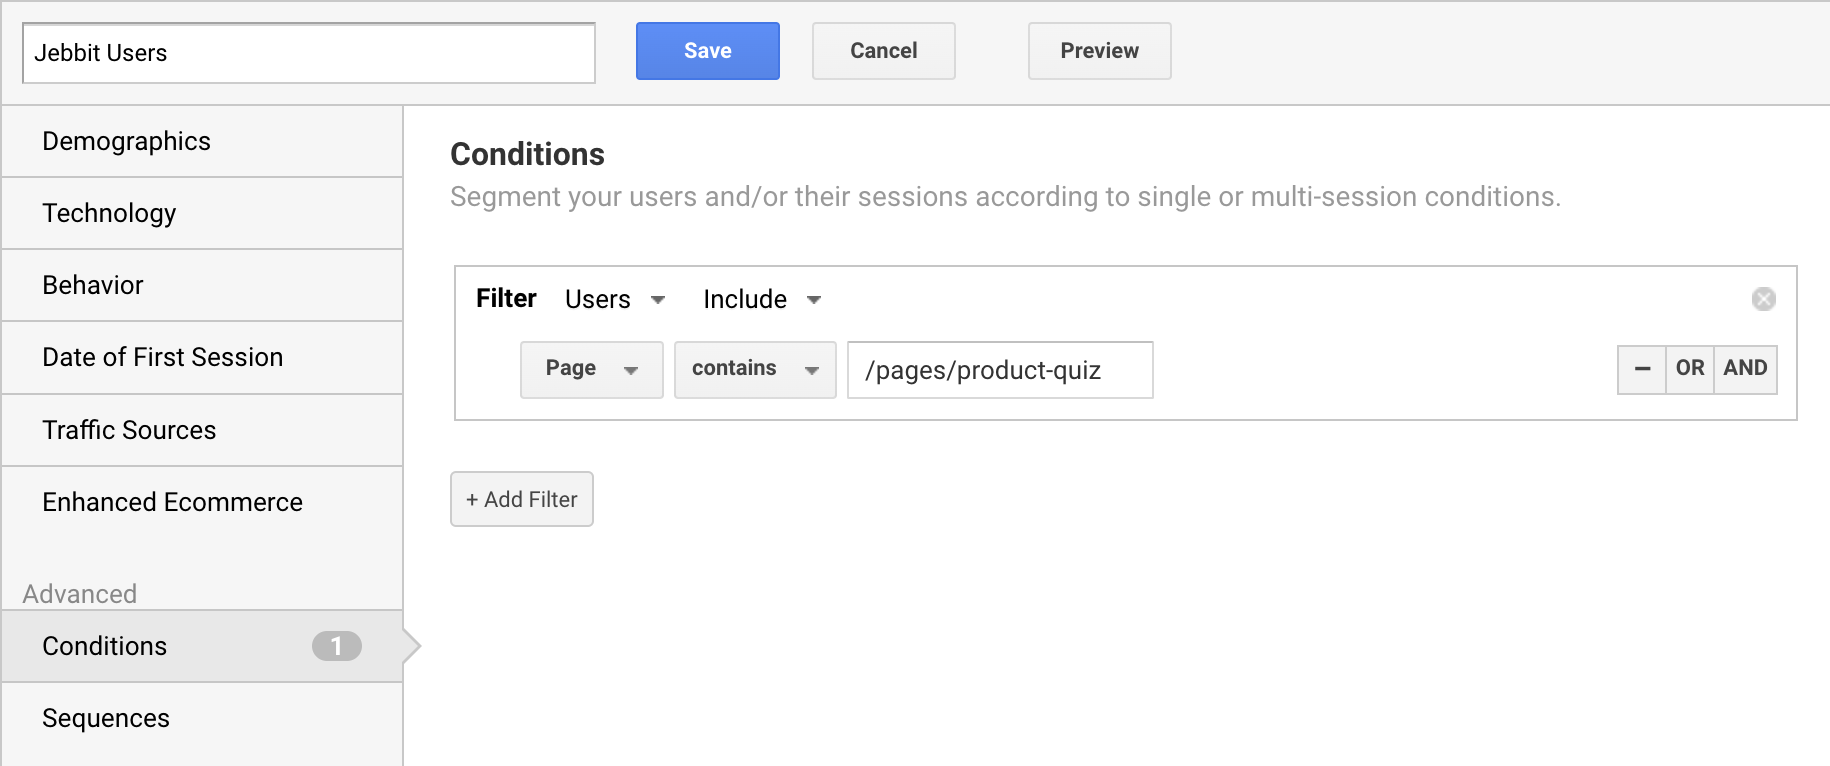
Click on Conditions, filter "Users" "Include".
Set select "Page" contains, and enter the URL of where your experience is embedded.
Name the segment, and click Save.
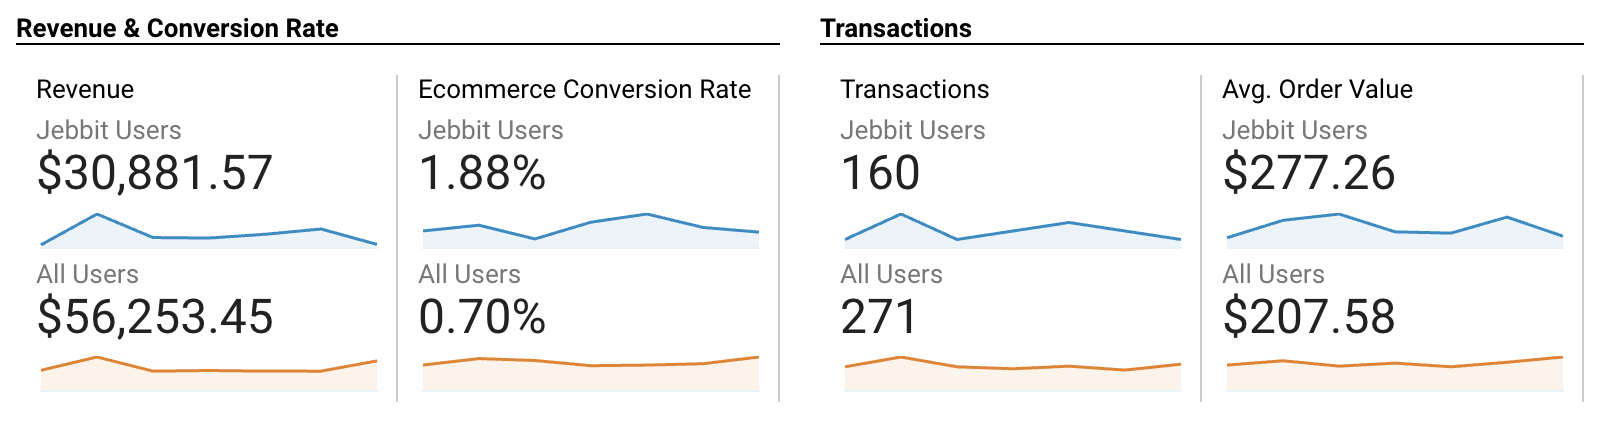
You can now see this segment in your reports to analyze the behavior of users that interacted with the Jebbit experience. If you navigate to Conversion > Ecommerce > Overview, you will see a breakdown of Revenue, Ecommerce Conversion Rate, Transactions, and Average Order Value. Comparing these metrics against All Users is a helpful report to see the impact that a Jebbit experience has on a user's journey.
To set up Advanced Tracking, make sure you have setup your GA4 Jebbit integration, or for complete customization, please refer to our GTM setup.
Once your GA4 Jebbit integration is setup, we will send 4 types of data to your Google Analytics measurement ID:
On Screen Load: page_view
This will fire a page view each time a screen is loaded.
It will pass a unique URL (ex: /h6u0jr7c/screen/4ql1sdsv), as well as the Screen Name
To capture the Screen Name, you can create a Custom Dimension to capture the "page_view" and "name" passed. Instructions below.
This is helpful to get a complete picture of which screens a user visited. Since your Jebbit experience is a single-page application (i.e. the URL does not change), this will notify GA each time a new screen is visited, and report it as a page view.
On Screen Response: custom_event
For each response a user selects, we will pass their response along with the name of the question.
This is helpful to understand your customer's preferences, and segment your data.
Examples:
How do conversion rates compare between users in each age group?
When we recommend X product, what percentage of users purchase it?
Which products are Side Sleepers most likely to purchase?
You need to setup a Custom Dimension to view this data. It is best to do this ASAP, as Google will not retroactively apply custom dimensions to past data. Instructions are listed below.
We fire a "response" and "name".
Lead Capture: generate_lead
When an email or phone number is captured, we will fire an event to tell GA we collected email. Note that we do not send the email address collected, as this is prohibited in Google Analytics as Personal Identifiable Information (PII).
Add to Cart: add_to_cart
If using our add to cart feature with Shopify or BigCommerce, we will fire an event when a user adds products to cart.
Frequently Asked Questions
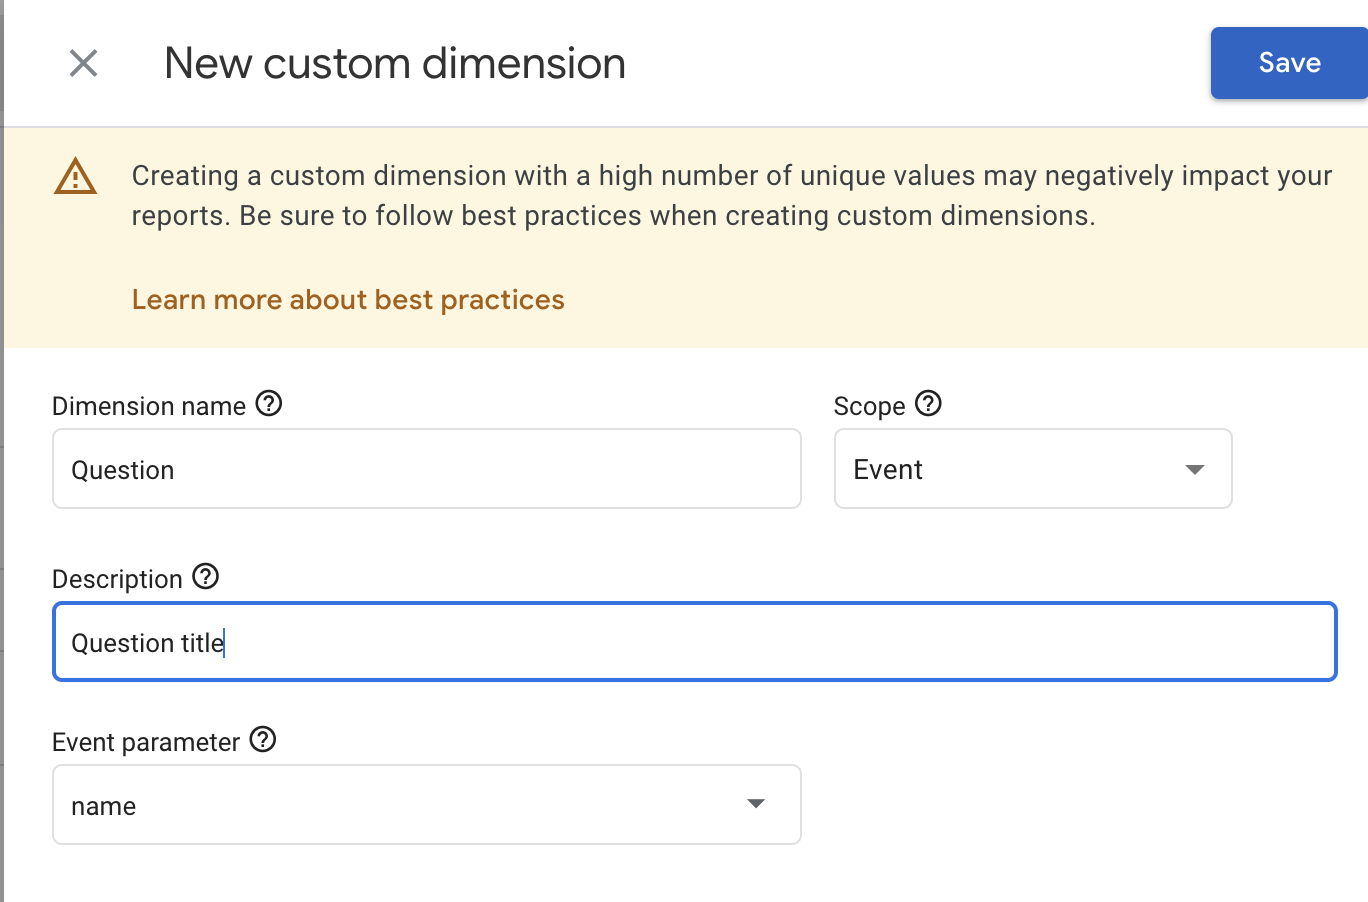
Q: How can I set up Custom Definitions in Google Analytics 4?
A: To set up Custom Definitions, follow these steps:
Go to Admin > Custom Definitions
Set your Dimension Name (we'll use "Question" as an example here)
Choose the Event Parameter (you will see a populated list to choose from)
For more customized tracking including question/answers, completions, and scenarios where your experience lives on multiple URLs across your site, please refer to our GTM setup.
Related Articles
Keywords: google analytics, conversion, aov, ga4, gtm, google pixel